Installing a Skylight: Your NSW How-To Guide
A lot of NSW homes have one room that never feels right. The kitchen needs lights on at lunchtime. The hallway stays dull no matter how bright the day is outside. The upstairs landing gets hot, then stale, then dark again by late afternoon. That's usually the point where homeowners start thinking about installing a skylight.
A skylight can fix more than gloom. Done well, it changes how a room works. You get better daylight, a stronger sense of space, and less reliance on artificial lighting through the middle of the day. If you're already thinking about lowering power use, it also fits into the same conversation as solar, batteries, EV charging, and roof ventilation. The roof shouldn't be planned one product at a time. It should be planned as one working system.
That matters even more in Sydney and greater NSW, where roof space is valuable. Every penetration, every cable path, every future solar panel position and every flashing detail affects what you can do next. A skylight is worth doing. It's just not something to place casually.
Brighten Your Home with Natural Light
The best skylight jobs start with a simple problem. A room has poor daylight, poor air movement, or both. In many homes, that's the open-plan living area at the centre of the house, a bathroom with no good window line, or a kitchen tucked under a deep roof section.
A skylight changes the light quality because it brings daylight from above, not from the side. In Australia, the shift toward energy-efficient homes has helped drive a 28% increase in skylight adoption in new dwellings between 2016 and 2021, and skylights can provide up to 30% more natural light than vertical windows while reducing artificial lighting needs by 40 to 60% during daylight hours, according to the Australian Bureau of Statistics. Those numbers line up with what installers see on site. A dark room often doesn't need more wattage. It needs better daylight placement.
Natural light also changes how a room feels at different times of day. Morning light in a kitchen is different from late afternoon light in a hallway. A skylight can make a compact room feel taller, cleaner and less closed in, especially when the shaft is finished properly and the ceiling line stays neat.
Practical rule: If a room needs lights on in clear daytime conditions, the problem is often daylight access, not just fixture choice.
The other benefit is that a skylight can support a broader efficiency plan instead of sitting outside it. If you're trying to reduce daytime consumption, improve ventilation, and use roof space more intelligently, it makes sense to treat daylight as part of that strategy. Looking at completed roof and home upgrades can help you see how different elements work together in real houses, not just on a product page. The Interactive Solar project gallery is useful for that because it shows how roof upgrades can be coordinated rather than bolted on one at a time.
Planning Your Skylight for Sun and Solar
Installing a skylight goes well when the planning is slow and the cutting is fast. Most mistakes happen before tools come out. Wrong location. Wrong unit type. Wrong roof face. No allowance for future solar. No check for rafters, wiring or ducting.
The biggest planning mistake is treating the skylight as if it exists on its own. It doesn't. It competes for roof area with solar PV, roof vents, valleys, ridges, safety access paths and services.
Choose the type before you choose the exact spot
Not every room needs the same skylight. A fixed unit suits spaces where the main goal is light. A vented unit helps where moisture or heat build-up is part of the problem. A tubular skylight can work where roof framing or tight ceiling spaces make a full skylight impractical.
| Skylight Type | Best For | Key Feature | Ventilation? |
|---|---|---|---|
| Fixed skylight | Living rooms, kitchens, stairwells | Direct overhead daylight with a simple sealed design | No |
| Vented skylight | Bathrooms, laundries, upper-floor rooms that trap heat | Brings in light and allows hot or moist air to escape | Yes |
| Tubular skylight | Hallways, walk-in robes, smaller internal zones | Channels daylight through a compact reflective tube | No |
A fixed skylight usually gives you the cleanest install and the fewest moving parts. A vented model earns its place in rooms that struggle with steam or trapped summer heat. Tubular units are often the answer when homeowners want daylight but don't want major structural changes or a large internal shaft.
Plan for solar now, even if solar comes later
This is the gap most general guides miss. Skylights and solar panels need to be planned together. The issue isn't only shading. It's also clearances, workflow, and making sure one trade doesn't create headaches for the next.
A key point for NSW homes is that guides often ignore the interaction between skylights and residential solar PV systems. Homeowners need integrated planning to avoid shading conflicts, structural complications, and compliance issues because AS/NZS 4802 requires specific electrical safety clearances around roof penetrations, including skylights, as noted by Standards Australia. In practice, that means the skylight position can affect panel layout, cable routing, access paths and where isolators or associated equipment can safely sit.
For homes that may add solar later, I'd generally reserve the cleaner, less shaded roof plane for panels first, then work the skylight into the secondary area if the room below still benefits. A well-lit room is valuable. A shaded solar array is a long-term compromise.
If you can only fit one major roof feature on the best roof face, solar usually wins that position and the skylight gets designed around it.
Roof structure matters more than brochure sizing
The brochure tells you what size skylight is available. The roof tells you what size skylight is sensible. Rafters, trusses, battens, valleys, hips, service runs and ceiling geometry all decide how clean the install will be.
Check these before locking in the opening:
- Framing layout: Cutting one rafter bay is very different from altering structural members that need redesign or additional support.
- Ceiling path: A beautiful roof opening can still produce a poor result if the ceiling shaft becomes awkward, narrow, or badly angled.
- Services in the cavity: Electrical wiring, downlight circuits, ducted air runs and exhausts often sit exactly where the skylight is proposed.
- Future roof use: Leave enough sensible roof area for later upgrades such as solar PV or roof ventilation solutions if the home needs better heat control.
For narrow homes, duplexes and tight urban lots, daylight planning gets even trickier because every square metre has to do more. The Flascon Construction Group narrow lot guide is a useful read because it looks at how natural light can be brought deeper into compact floorplans without wasting valuable space.
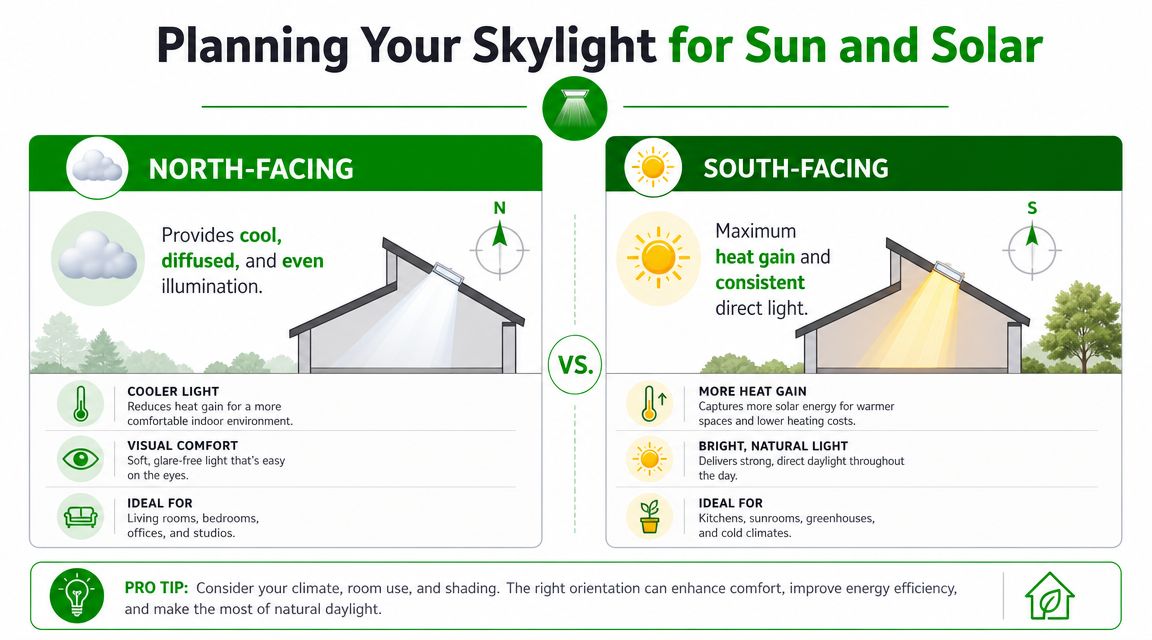
Orientation and approvals
Orientation changes the feel of the light and the heat profile of the room. Some homeowners chase the brightest roof face without thinking about glare or seasonal comfort. Others avoid a good location because they assume all direct sun means overheating. The right answer depends on glazing, room use, shaft depth, roof shape and what else is happening on that roof.
Before installation, also check whether your job needs approvals or additional sign-off. Straightforward replacements are one thing. Structural alterations, heritage constraints, strata buildings, or complex roof changes are another. If there's any doubt, sort that out before anyone starts cutting.
Gathering Your Tools and Materials
A skylight install goes off the rails when the kit is incomplete. People focus on the skylight unit and forget the membrane, the flashing compatibility, the right sealant, or the safety gear needed to work at height properly. By the time they realise something's missing, the roof is open.
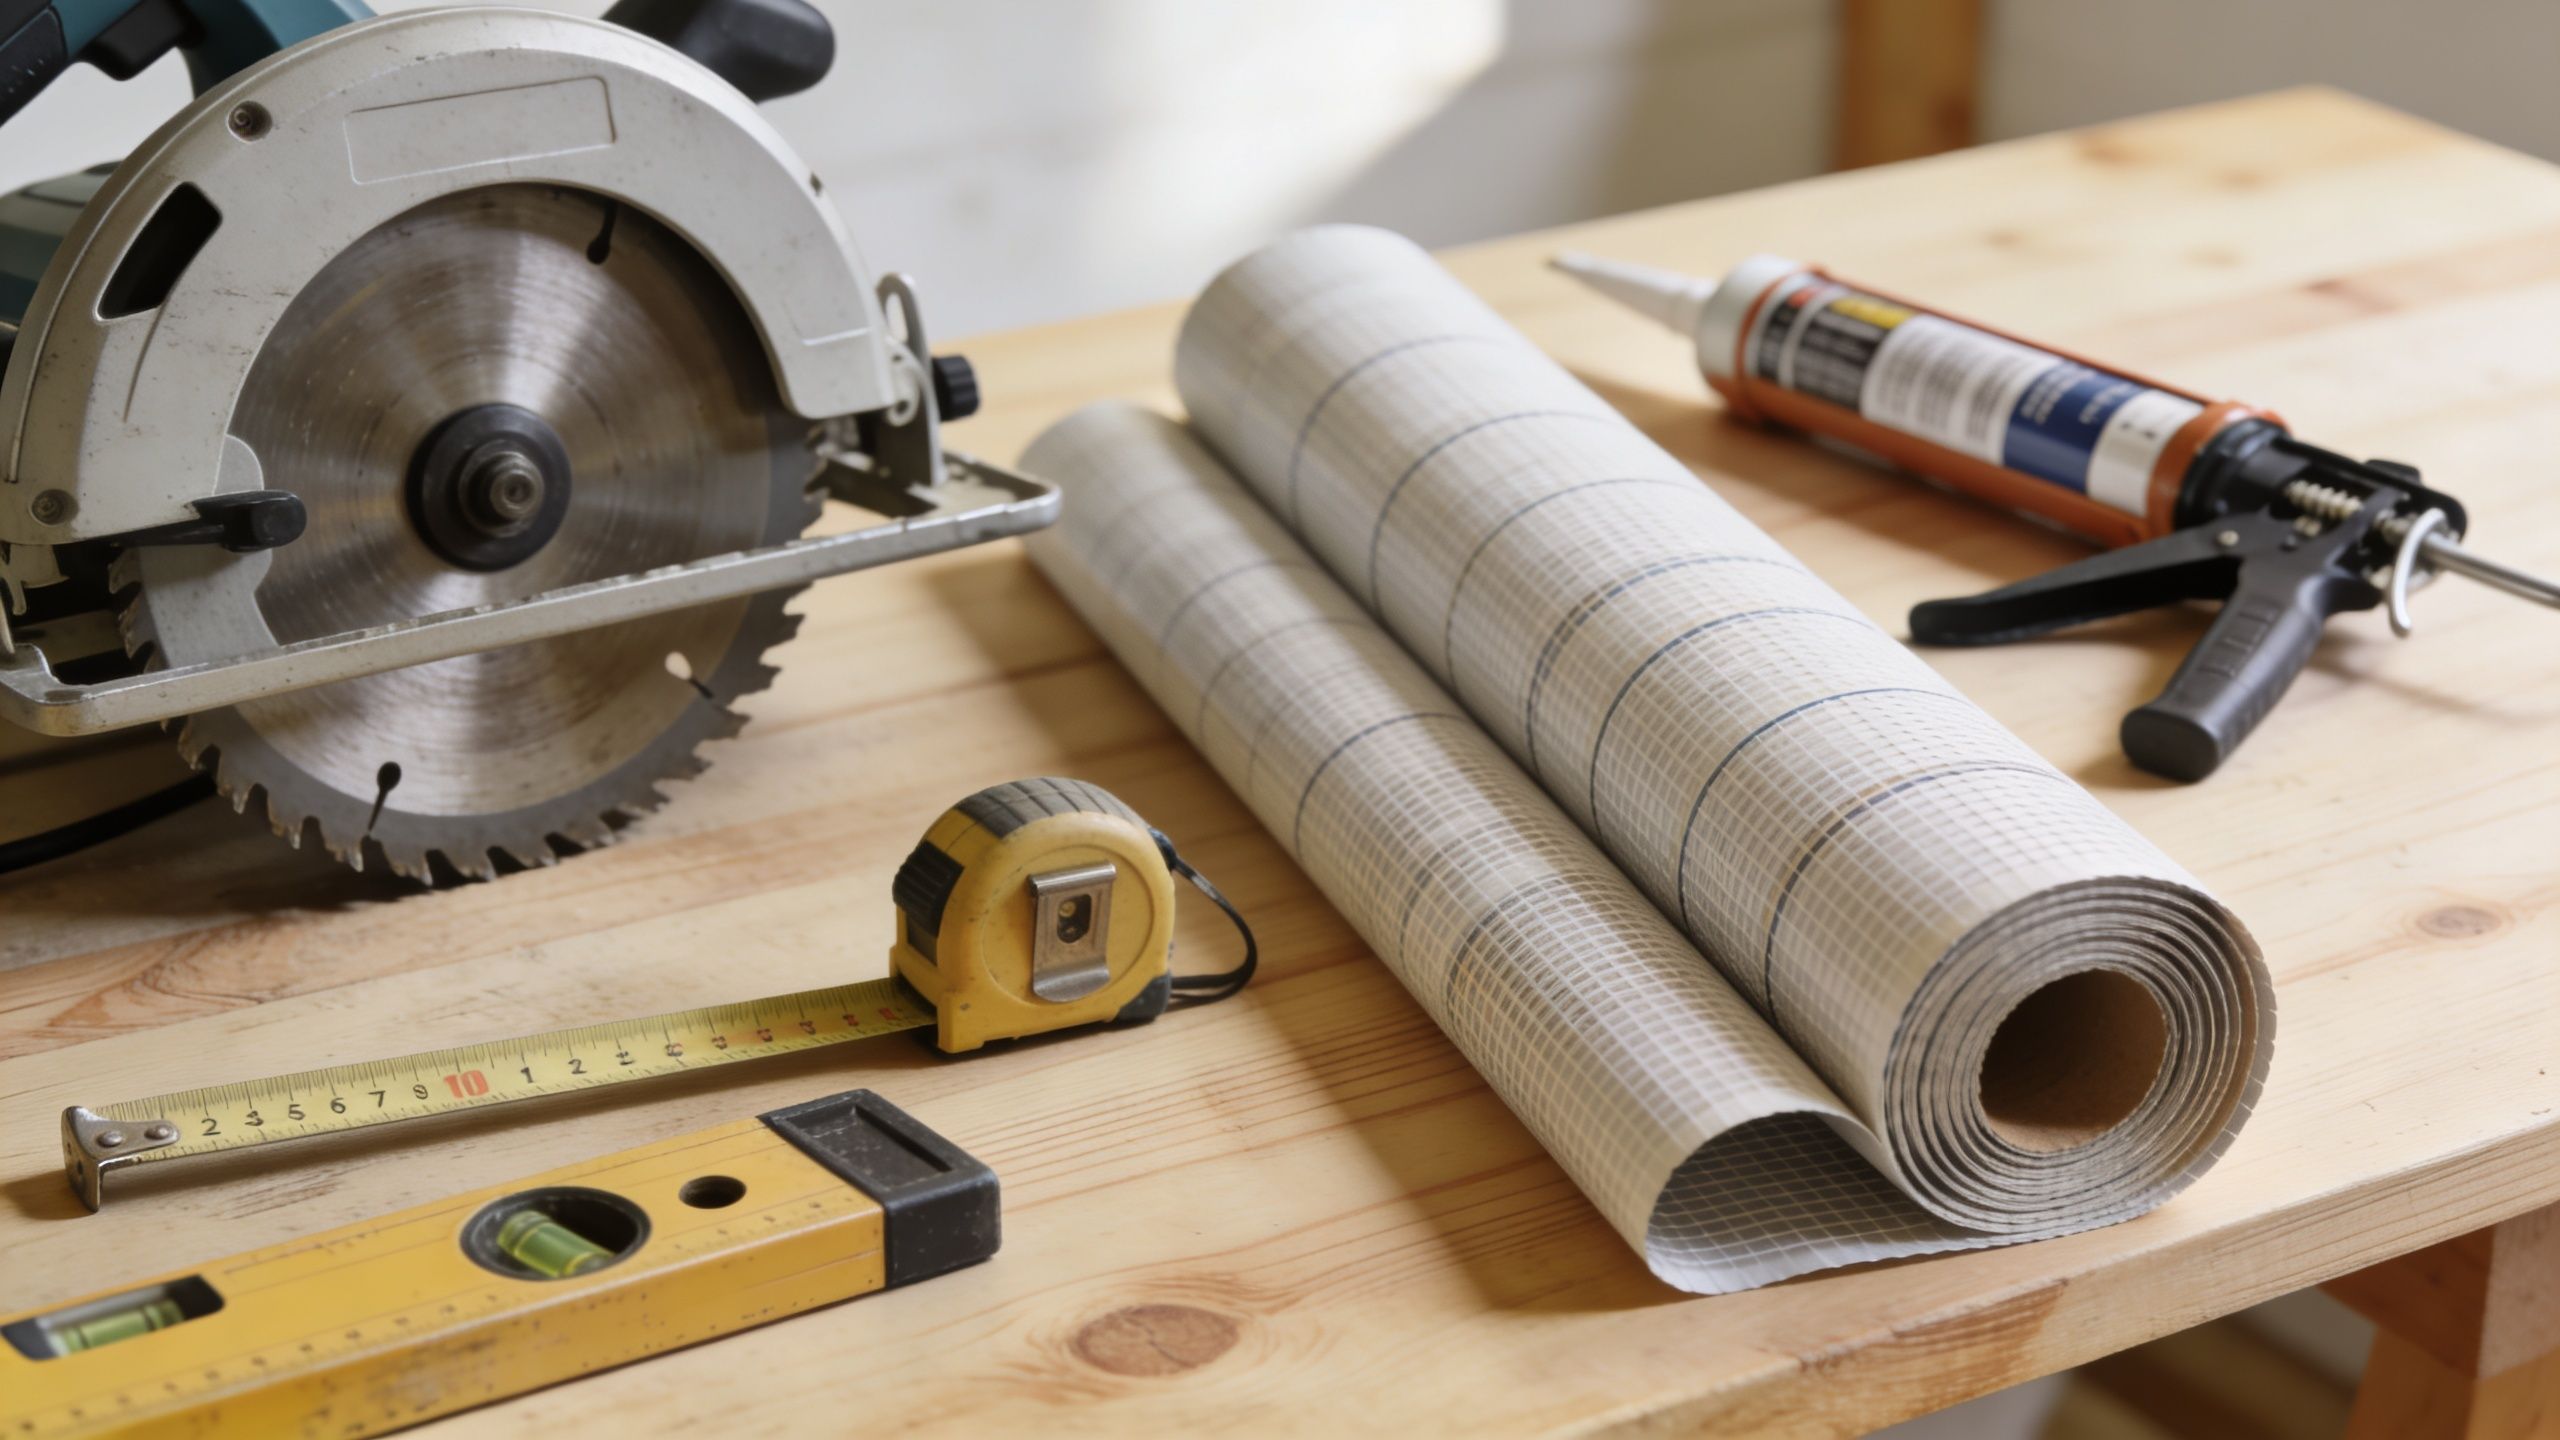
Tools that do the real work
You don't need every tool in the catalogue, but you do need the right ones ready before the first tile, sheet, or shingle comes off.
- Measuring and marking gear: Tape measure, chalk line, framing square and pencil. Good set-out prevents ugly shafts and off-centre openings.
- Cutting tools: Circular saw, reciprocating saw, utility knife and the correct blades for timber, sheet material or metal roofing where applicable.
- Fastening gear: Drill-driver, impact driver, manufacturer-specified screws or roofing fasteners, and a hammer for framing and flashing details.
- Levelling tools: A bubble level helps keep the frame, shaft lines and interior finish honest.
- Access equipment: Extension ladder, roof ladder if needed, and harness equipment suitable for the roof pitch and site conditions.
Materials you shouldn't substitute
Most leaks don't happen because the idea of a skylight is bad. They happen because someone swapped proper components for whatever was in the van.
Use a complete, compatible set of materials:
- Skylight unit and matched flashing kit: The flashing should suit the roofing material and roof profile.
- Self-adhesive waterproof membrane: This is not optional around the opening.
- Neutral-cure exterior sealant: Use a quality product approved for roofing and glazing applications.
- Structural timber for trimming and support: Needed if the opening requires framed reinforcement.
- Insulation and interior lining materials: Plasterboard, jointing materials and trim complete the internal finish and help control drafts.
- Protective coverings: Drop sheets and plastic sheeting keep the room below under control during cutting and finishing.
The cheapest part on the invoice can become the most expensive part of the repair if it's the wrong flashing tape or the wrong sealant.
Safety gear isn't a side note
Roof work demands proper PPE and proper fall protection. Gloves, eye protection, non-slip boots and dust control all matter, but height safety is the issue that can't be improvised. If you wouldn't trust your setup in wet or windy conditions, it isn't good enough.
For homeowners tackling other home projects, the logic is similar to any trade prep list. The essential house painting gear list is a good reminder that clean work starts with proper preparation, not with scrambling halfway through.
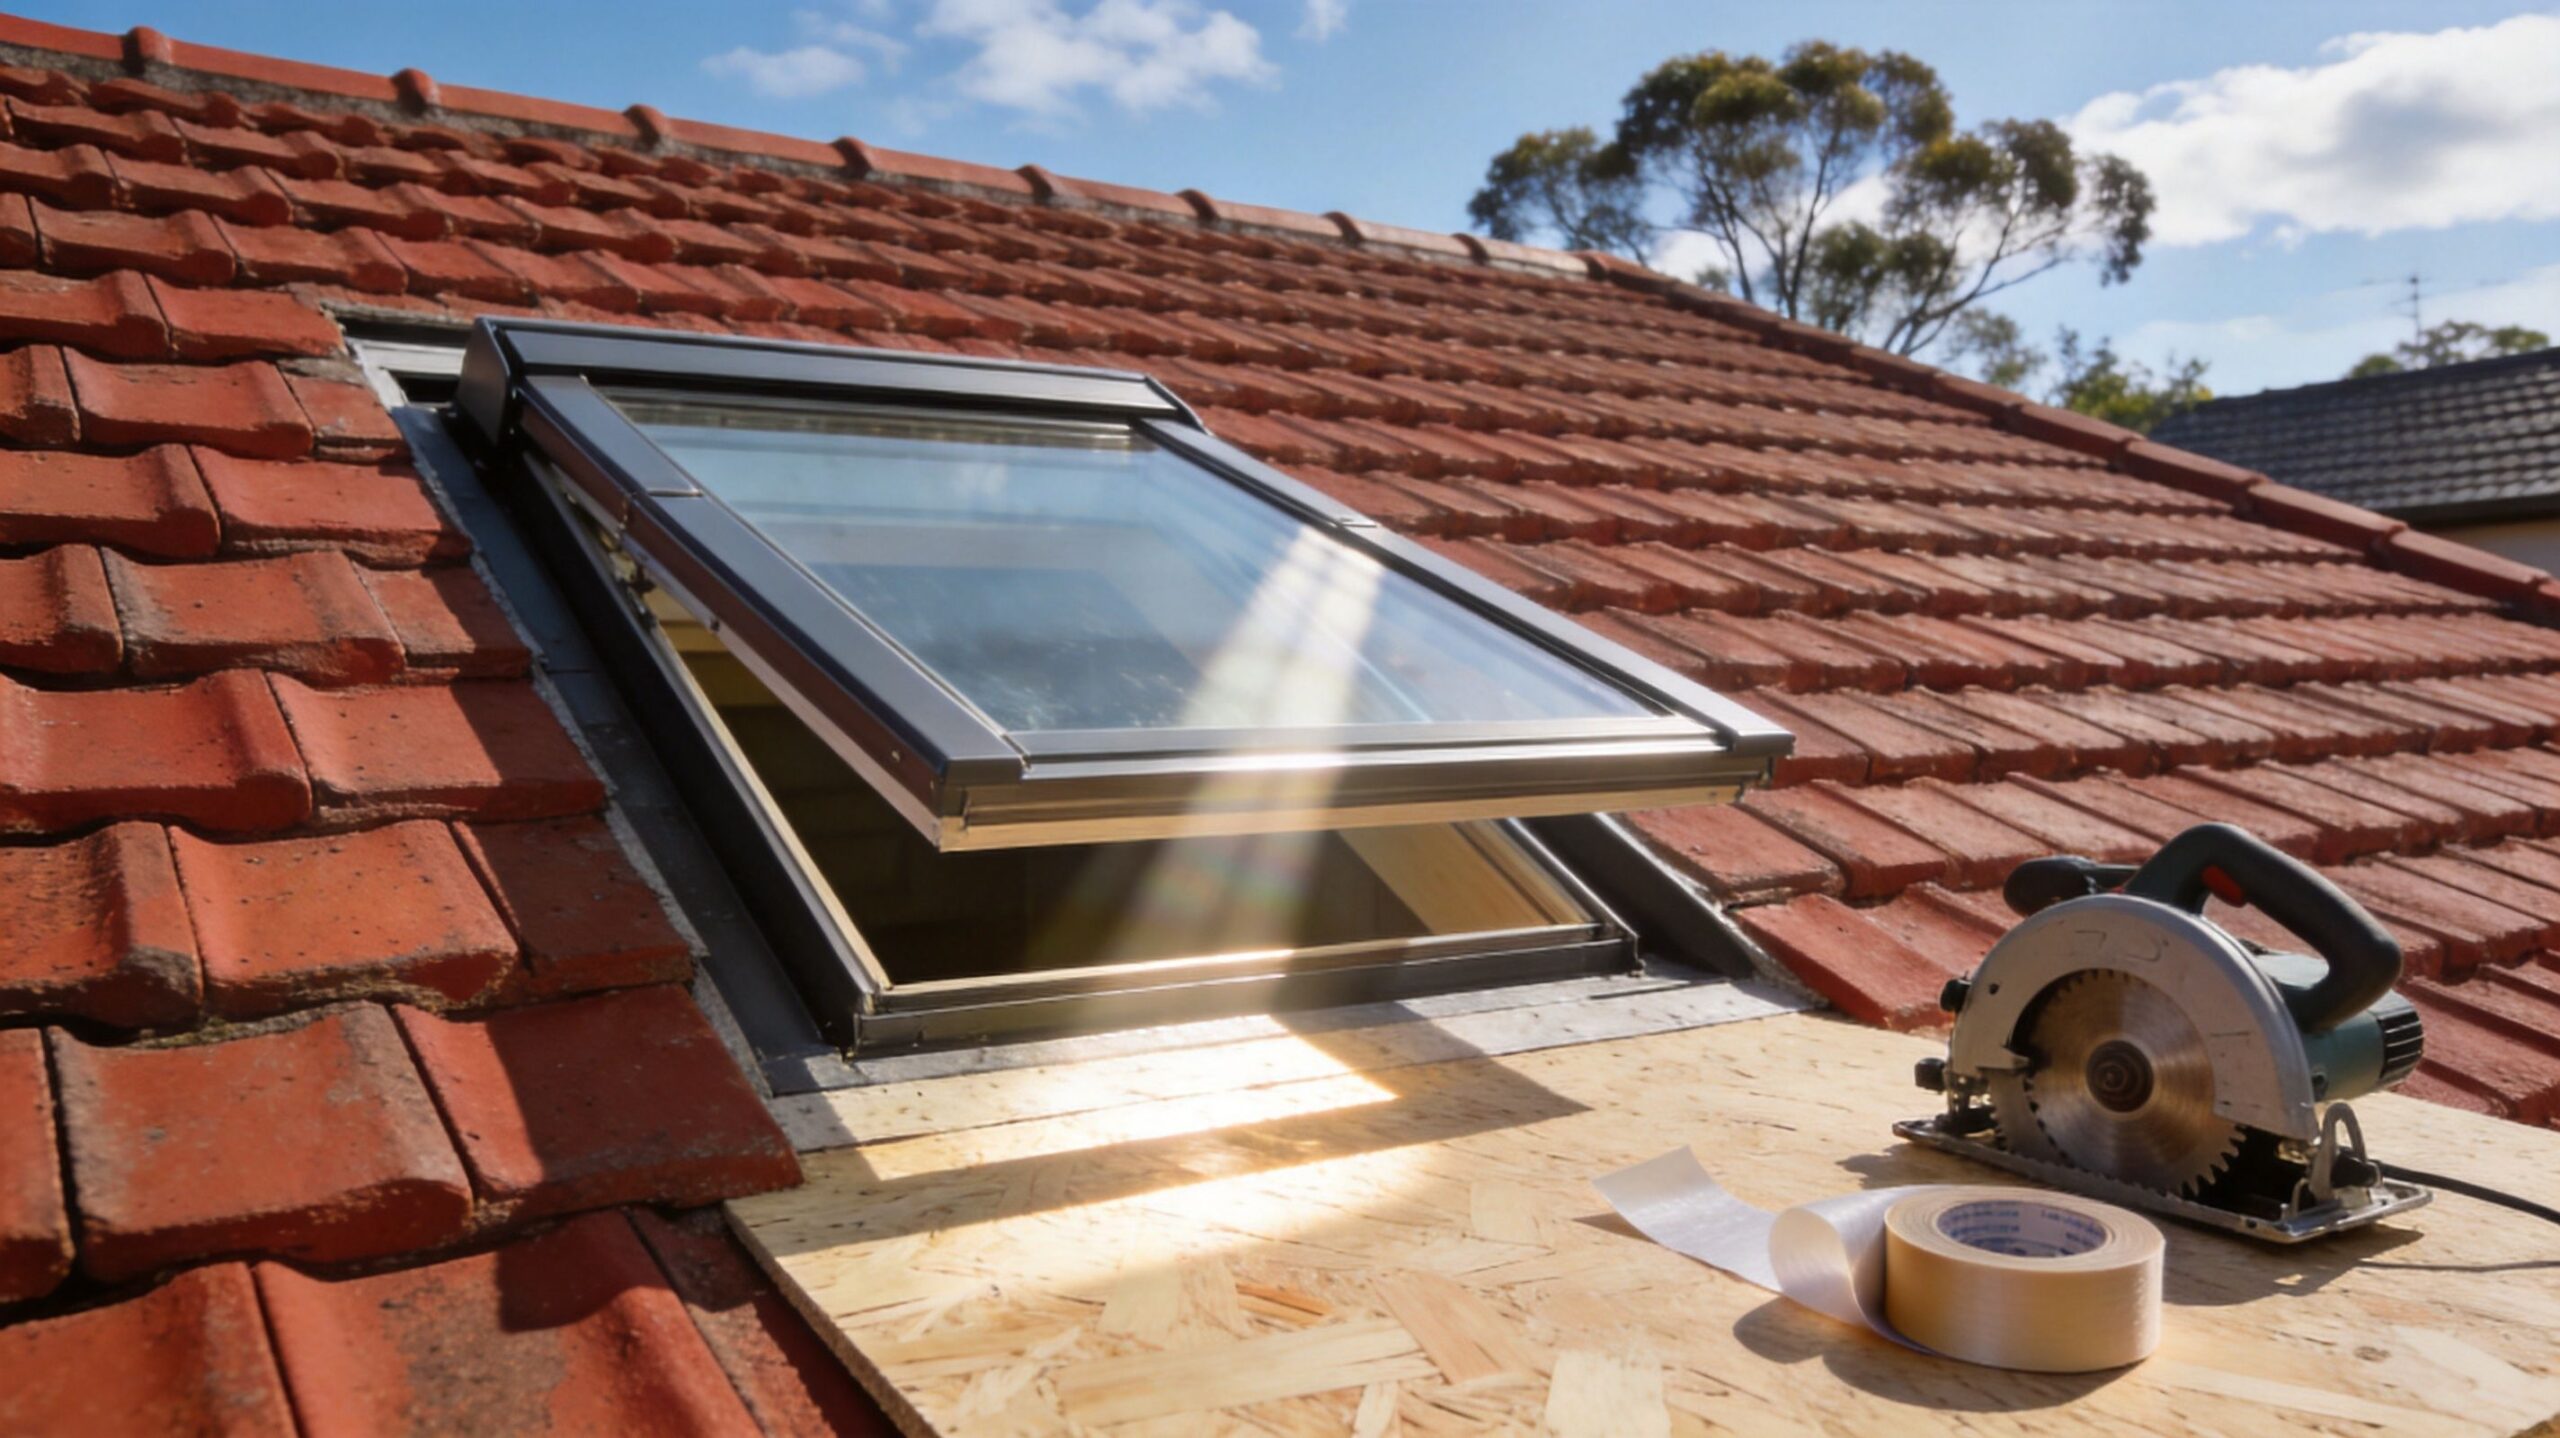
A Guide to Cutting and Waterproofing the Opening
Installing a skylight marks the transition from planning to a test of workmanship. Once the opening is cut, the roof has to be put back together in a way that manages water, wind and movement over time. Clean layout matters. Flashing sequence matters more.
Mark the opening twice and cut once
Start inside if possible. Confirm the room position, locate framing, and check for wiring, ducts and other obstructions. Then transfer those measurements to the roof with care. A few millimetres out at set-out can become a visibly crooked shaft indoors.
Once the roofing in the work area is removed or pulled back, mark the opening to the manufacturer's dimensions. Cut conservatively and keep the opening square. If trimming or framing changes are needed, complete those before the skylight goes anywhere near the hole.
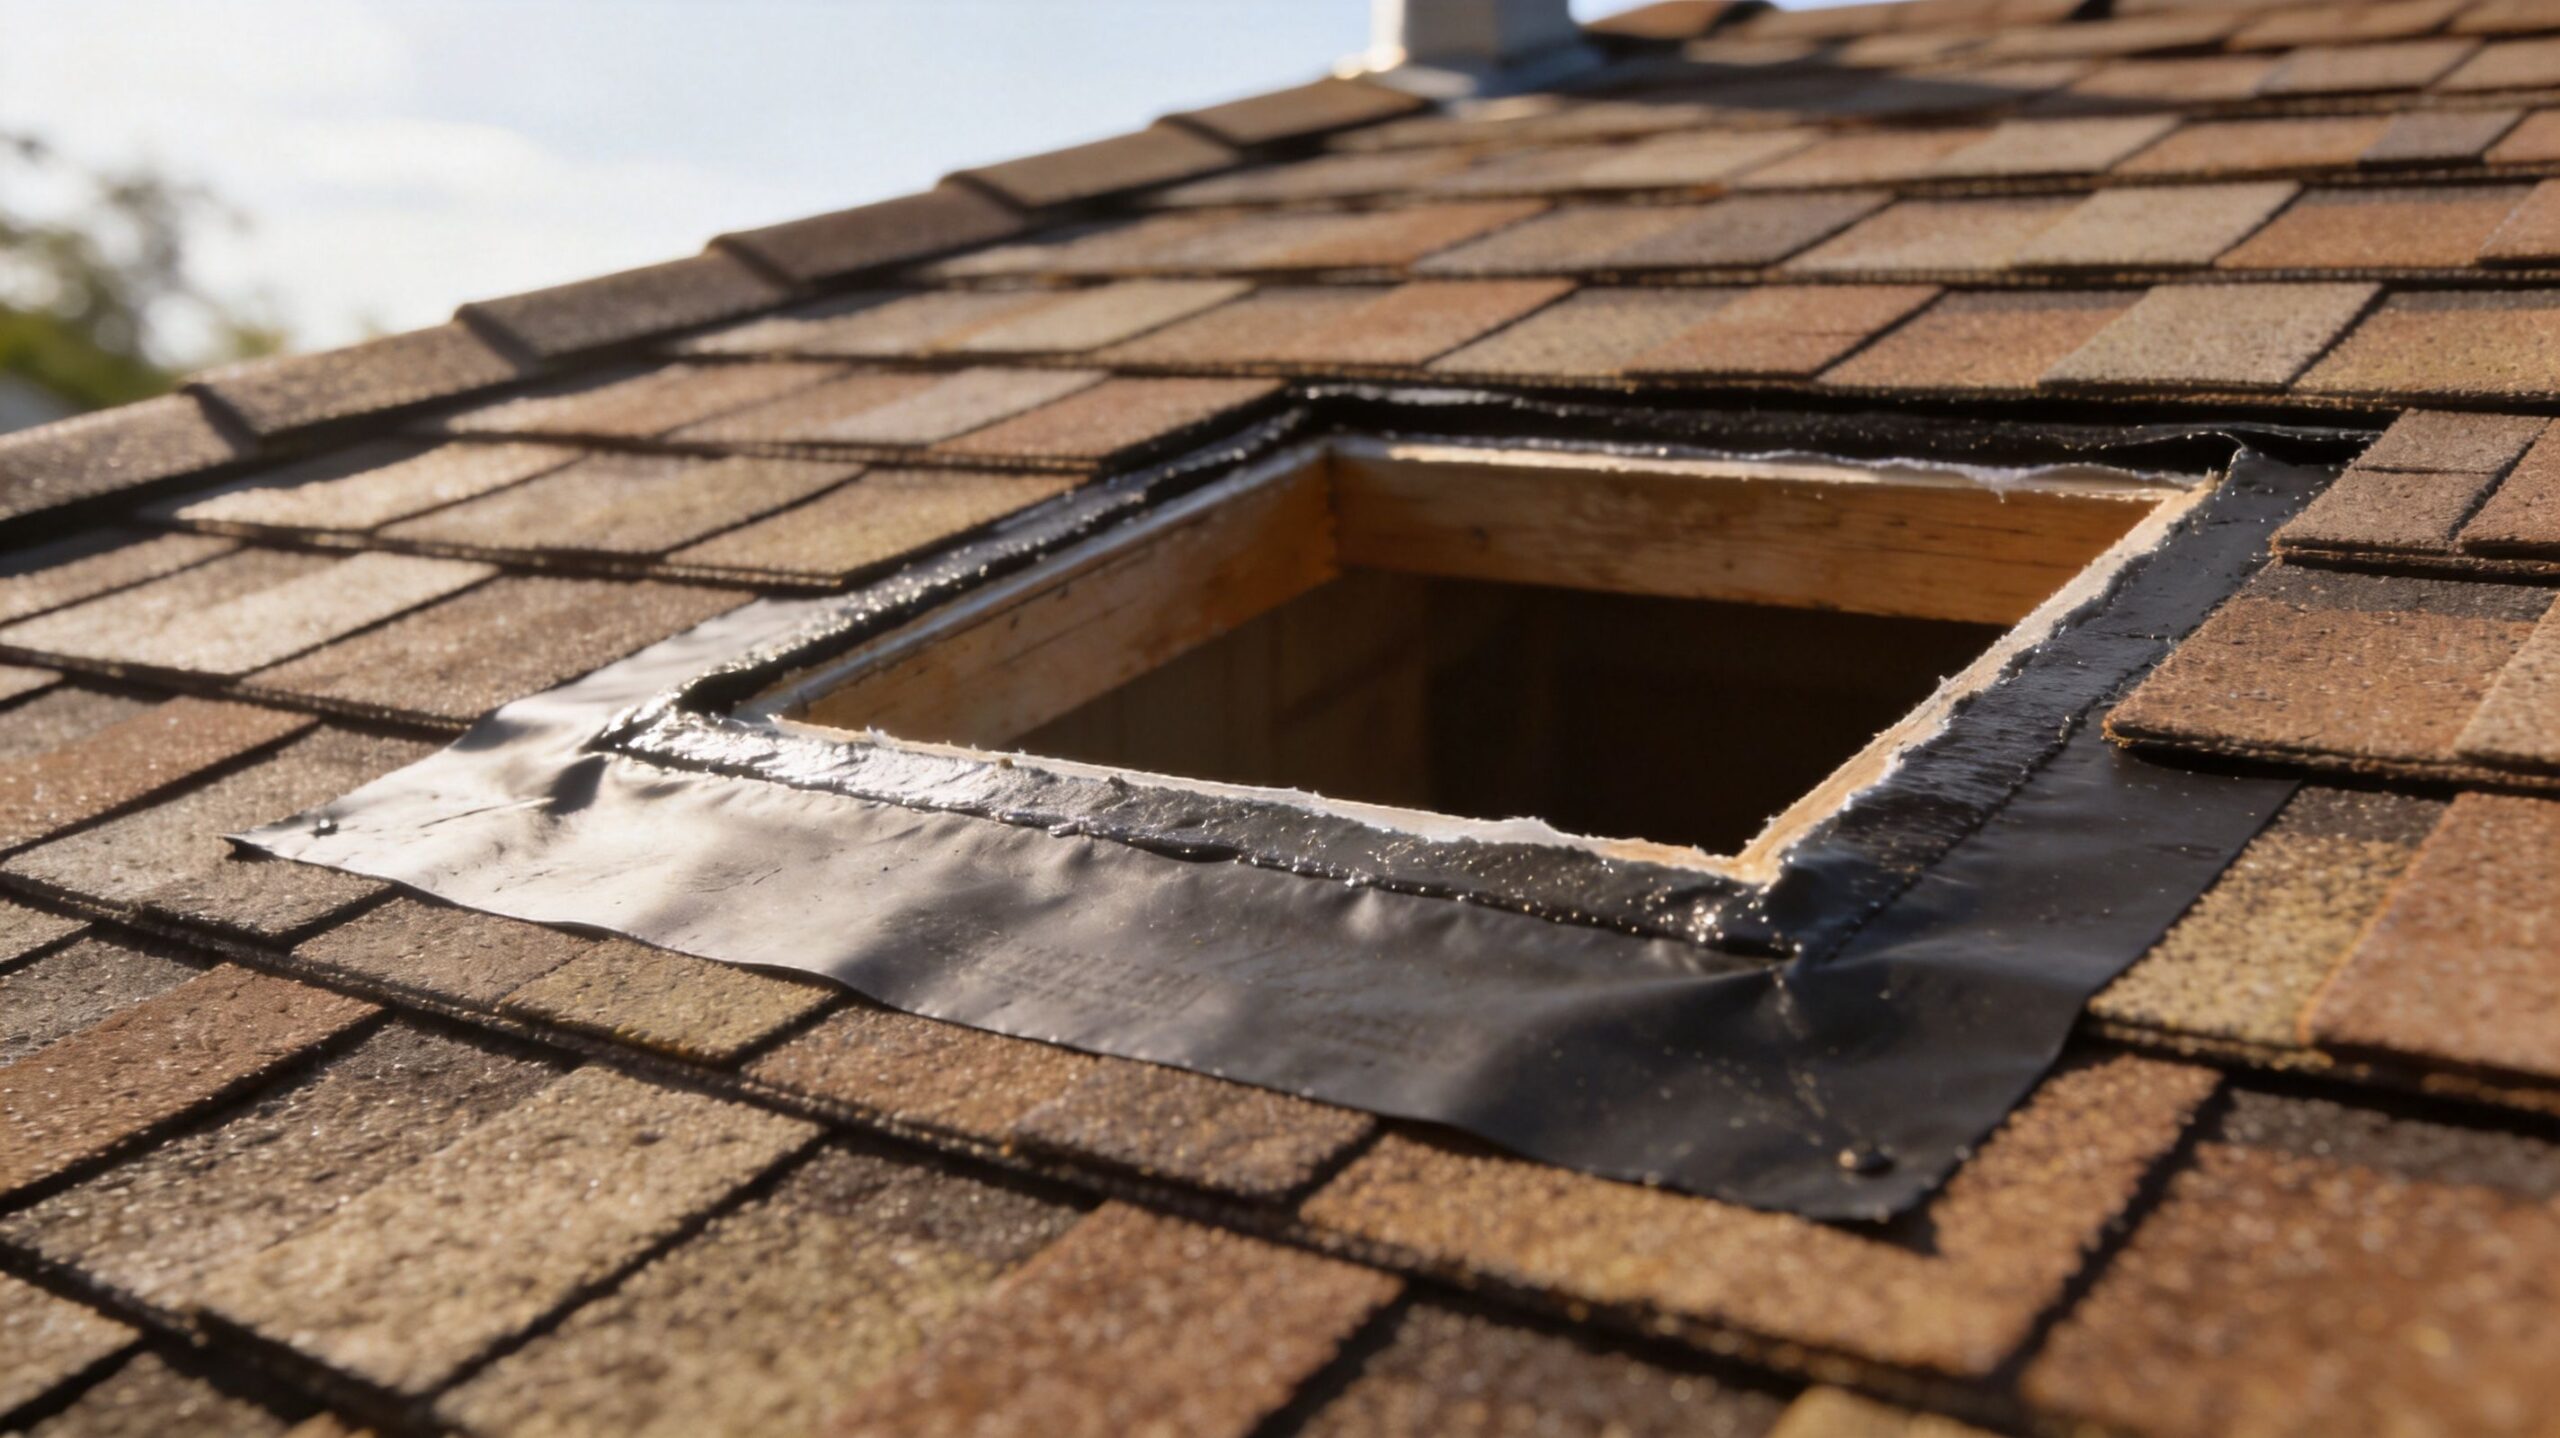
Waterproofing is a sequence, not a smear of sealant
The critical detail is the layering order. A watertight skylight doesn't rely on one bead of sealant. It relies on water being directed over each lower layer and away from the opening.
According to the This Old House skylight installation guide, a multi-layered waterproofing approach is critical. It starts with a self-adhesive membrane on the sill, then uses interwoven step flashing and roofing materials up the sides, and finishes with saddle flashing at the top. That sequence matters because improper layering is a leading cause of water infiltration, which can lead to structural damage and mould within 6 to 12 months.
A practical site sequence usually looks like this:
Prepare the sill first
The bottom edge is the vulnerable point. Apply the self-adhesive membrane neatly across the sill area and extend it correctly past the sides.Wrap and protect the opening
Install the waterproof underlayment around the frame opening so wind-driven water can't easily find exposed timber edges.Install side flashing in layers
Step flashing needs to interweave with the roofing material, not sit against it as decoration. Each course should shed water onto the course below.Finish with the head flashing
The top flashing, often called saddle flashing, sends water around and away from the unit instead of behind it.
Here's a useful visual overview of the process in action:
What works and what fails on NSW roofs
On site, the jobs that hold up are the ones where installers respect water flow. The failures usually come from shortcuts. Fastening through the wrong place. Relying on sealant where flashing should do the work. Forcing a standard flashing kit onto a roof profile it wasn't made for.
These habits cause trouble:
- Overcut openings: They make framing and internal finishing harder, and they can weaken the support around the unit.
- Backwards flashing sequence: Water gets a path behind the visible finish.
- Poor membrane adhesion: Dust, moisture, or rushed prep stops the membrane bonding properly.
- Wrong kit for the roof type: Tile, corrugated metal and other profiles each need compatible flashing details.
- No thought for adjacent systems: Solar cables, brackets or future panel zones can end up boxed in by a badly placed skylight.
One reason roof work quality matters so much is that homeowners often can't see the problem until the ceiling stains. By then, water may already be in insulation, plasterboard and framing. That's why build quality is worth taking seriously from the start, and it's the same principle behind quality-focused roof and solar installation work. The roof system only performs as well as the install.
A skylight shouldn't depend on luck, dry weather, or extra silicone to stay watertight.
Finishing the Interior and Connecting Power
A skylight can be perfectly watertight outside and still look average inside. The internal finish is what turns a roof penetration into part of the room, and requires tidy proportions, lining work, and electrical integration.
Build a clean light shaft
The shaft controls how daylight enters the room. If the shaft is too cramped, heavily angled for no reason, or poorly lined, the finished skylight won't deliver what the roof opening promised.
For a good internal finish:
- Frame the shaft square and true: Crooked shaft lines are obvious once the plasterboard goes on.
- Insulate where needed: This helps with thermal performance and can reduce condensation risk.
- Keep reveals neat: Straight edges and consistent corners make the skylight look built-in, not patched in.
- Use light finishes wisely: Pale interior finishes help bounce daylight deeper into the room.
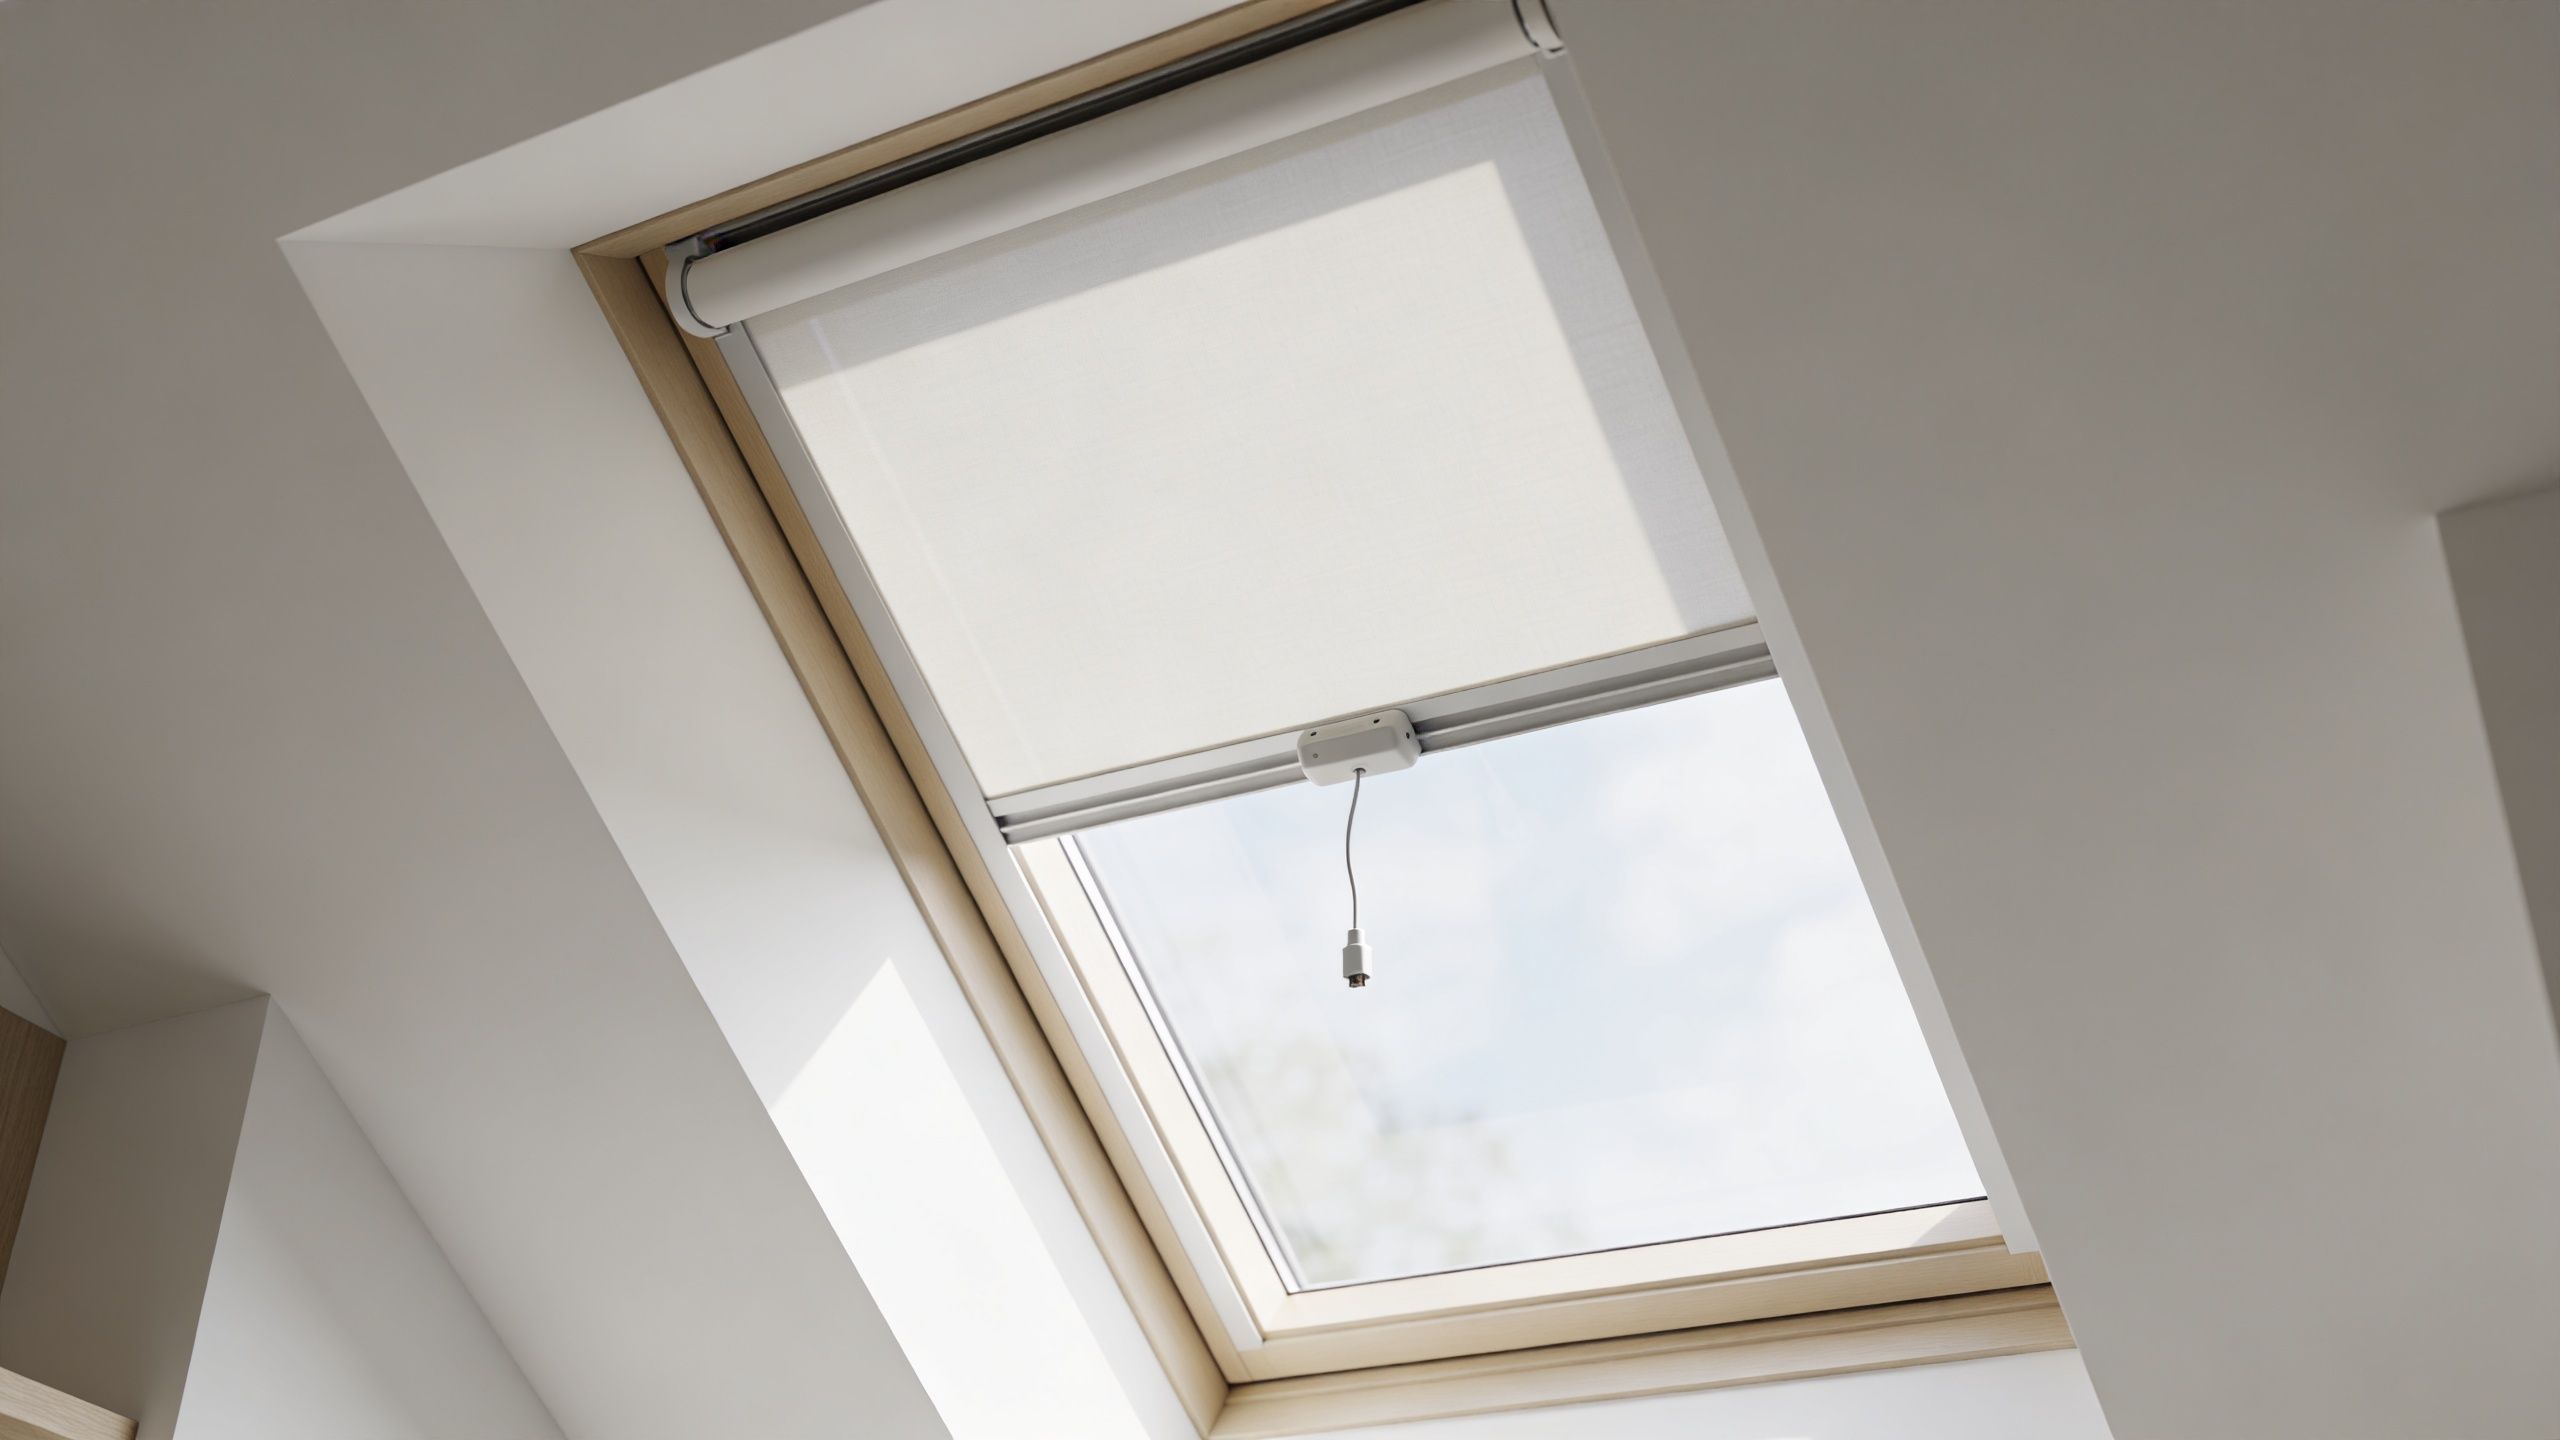
Electrical work has to be done properly
Fixed skylights may not need any power at all. Vented skylights, powered blinds, rain sensors and control systems are different. Once you add electrical components, the job moves beyond carpentry and roofing.
In NSW, electrical connection work must be handled legally and safely. That includes checking cable paths, isolation requirements, switch positions and whether the skylight location conflicts with existing roof services. This gets even more important when the home already has solar, or may add it later, because roof penetrations and electrical infrastructure need to coexist cleanly.
A properly installed skylight can offset 20 to 35% of daytime electricity use in Sydney homes, and since the 2021 NSW Energy Savings Scheme, installations have risen 42% in greater Sydney. Integrating skylights with roof ventilation can further cut strata energy bills by 12 to 22%, according to the NSW energy programs and schemes information. Those benefits are strongest when the skylight is part of a broader energy plan, not treated as a standalone feature.
Think about the whole home, not just the window
Many homeowners who improve daylight also start looking at the next step. Better ventilation. Better control of daytime loads. Cleaner charging for an EV. Once you're already thinking about roof space and household energy use, it makes sense to look at related upgrades like home EV charger installation options as part of the bigger picture.
The main point is simple. The inside finish should look integrated, and the powered parts should be connected by the right licensed trade. A neat plaster line is cosmetic. Safe wiring is not.
Common Issues and When to Call a Licensed Installer
Most skylight problems fall into one of three groups. Water, condensation, or unwanted heat. The trick is diagnosing the right cause before tearing into the wrong part of the roof.
What often goes wrong
A leak isn't always a failed skylight unit. Sometimes the water is entering higher up the roof and showing itself at the skylight opening because that's the easiest path through the ceiling. Condensation can also mimic a leak, especially in bathrooms, laundries or poorly ventilated rooms.
Watch for these signs:
- Brown ceiling marks after rain: Often points to flashing, roof covering defects, or water tracking from elsewhere.
- Moisture on the inside glass: More likely a ventilation or humidity issue than an external leak.
- Hot glare in summer afternoons: Usually a placement, glazing or blind-control issue.
- Drafts around the opening: Can indicate poor interior sealing, insulation gaps, or movement around the frame.
Persistent moisture around a skylight should never be dismissed as normal. Water always has a path, and the job is finding the real one.
When a licensed installer should take over
Some skylight jobs are manageable. Others should be handed straight to a qualified professional. If the roof is steep, brittle, high, complex, or packed with solar equipment and services, the risk climbs fast.
Call a licensed installer when:
- Structural changes are required: Altering rafters or trusses needs proper assessment and competent execution.
- The roof layout is complicated: Valleys, junctions, multiple penetrations and tight access increase the failure risk.
- The leak keeps coming back: Repeat patching usually means the root cause hasn't been solved.
- Electrical components are involved: Powered venting, blinds, controls, and nearby solar infrastructure require proper coordination.
- You need compliance certainty: If you're unsure about roof penetrations, safety clearances or workmanship standards, get it checked.
For homeowners who still have questions about process, compliance, or what kind of roof work suits their home, the Interactive Solar FAQ page is a practical place to start. If the job reaches the point where you need a licensed team, that's where experience matters. Interactive Solar operates under Licence #329360c, and this is exactly the kind of roof and electrical coordination that benefits from qualified installers rather than guesswork.
If you're weighing up installing a skylight, planning solar around an existing roof, or trying to make the whole home more efficient, talk to Interactive Solar. Their team handles solar, batteries, EV chargers, roof ventilation and related roof work with licensed in-house trades, so your roof can be planned as one system instead of a series of disconnected upgrades.