Expert Solar Panel Installation Blacktown
Your latest electricity bill lands in your inbox, and it is higher than you expected again. You have probably already thought about solar, but the key question is not just whether panels will fit on the roof. It is whether the whole setup will work properly for your home, your usage habits, and the way you are likely to use energy over the next several years.
That is where most Blacktown property owners either make a smart decision or an expensive one. A good solar panel installation blacktown project starts well before any panel goes on the roof. The right approach looks at roof condition, switchboard capacity, daytime usage, future battery plans, and whether an EV charger is likely to be part of the picture soon.
A lot of systems look fine on paper and underperform in real life because they were sold as panel packages, not designed as complete energy systems. If you want lower bills and fewer regrets later, plan the full energy layout first.
Is Your Blacktown Property Ready for Solar Power
The first site check is never just “do you have roof space?”. In Blacktown, I look at four things before I care about panel count. Roof direction, shading, roof condition, and switchboard readiness.
If any one of those is wrong, the system can still be installed, but it may not be the right system, and it may not be worth installing yet.
Roof direction matters more than generally understood
In Blacktown, panels should face true north for maximum output. That point gets oversimplified all the time.
A compass points to magnetic north, not true north. On Australia’s eastern seaboard, magnetic north sits about 11 to 12 degrees east of true north, so the installer needs to correct for that when setting panel alignment. If they do not, annual yield can drop by 1 to 3%, which can cost a typical 6.6kW system owner $25 to $75 in lost savings each year according to the Blacktown solar orientation guidance from SolarQuotes.
That sounds minor until you remember solar is a long-term asset. Small orientation mistakes stay with you every day the system operates.
Tip: Ask the installer how they determine true north on site. If the answer is just “we use a compass”, keep asking questions.
Shade is not a small problem
A few trees in the wrong spot can affect output far more than many sales quotes admit. Morning shade, late afternoon shade, vent pipes, neighbouring upper storeys, and TV antennas all change how the array should be laid out.
What works:
- Detailed shade assessment: The installer maps where shade falls across the day and across seasons.
- Array separation: Different roof faces or shaded zones may need separate panel groupings.
- Realistic design decisions: Sometimes fewer panels in better positions outperform a larger messy layout.
What does not work:
- Forcing every panel possible onto the roof
- Ignoring partial shade because the roof “still gets plenty of sun”
- Treating east, west, and north faces as if they perform the same
Check the roof before you check the panel brand
If the roof needs repairs in the near term, handle that first. Pulling panels off later to fix cracked tiles, worn sheeting, or failed waterproofing is avoidable if the roof is assessed properly at the start.
On tile roofs, the mounting method matters. Good installers pay close attention to bracket placement, tile grinding where needed, flashing details, and waterproofing around penetrations.
I also look for practical issues such as:
- Brittle tiles: Older tiles can crack during installation if handled poorly.
- Limited access: Tight side passages or steep roof sections change labour and safety planning.
- Future maintenance access: Panels should not block access to key roof areas unnecessarily.
Your switchboard can decide how smooth the job goes
A lot of homeowners focus on panels and inverter models, then get surprised when the installer says the switchboard needs work. That should be identified early.
You want the site inspection to confirm:
- Available space in the board
- General board condition
- Whether protection devices are up to standard
- Whether the layout allows clean integration of solar, battery, and EV charging later
A switchboard that is already crowded or outdated can delay the project. It can also limit your options if you want to add a battery-ready inverter or dedicated EV charger circuit later.
For homeowners comparing options, a proper residential solar assessment should include this level of detail, not just a remote quote based on satellite images.
A short pre-flight checklist
Before you request quotes, have a quick look at these items:
| Check | Why it matters |
|---|---|
| Roof faces with the most sun | Helps determine likely panel placement |
| Trees and neighbouring shade | Affects generation and panel layout |
| Roof age and condition | Avoids reinstall costs later |
| Switchboard photo | Helps identify likely electrical constraints |
| Future plans for battery or EV | Changes inverter and circuit decisions |
A strong solar project begins with honesty. Some properties are ready now. Some need roof work first. Some need a better electrical plan. The best installers do not rush past those details.
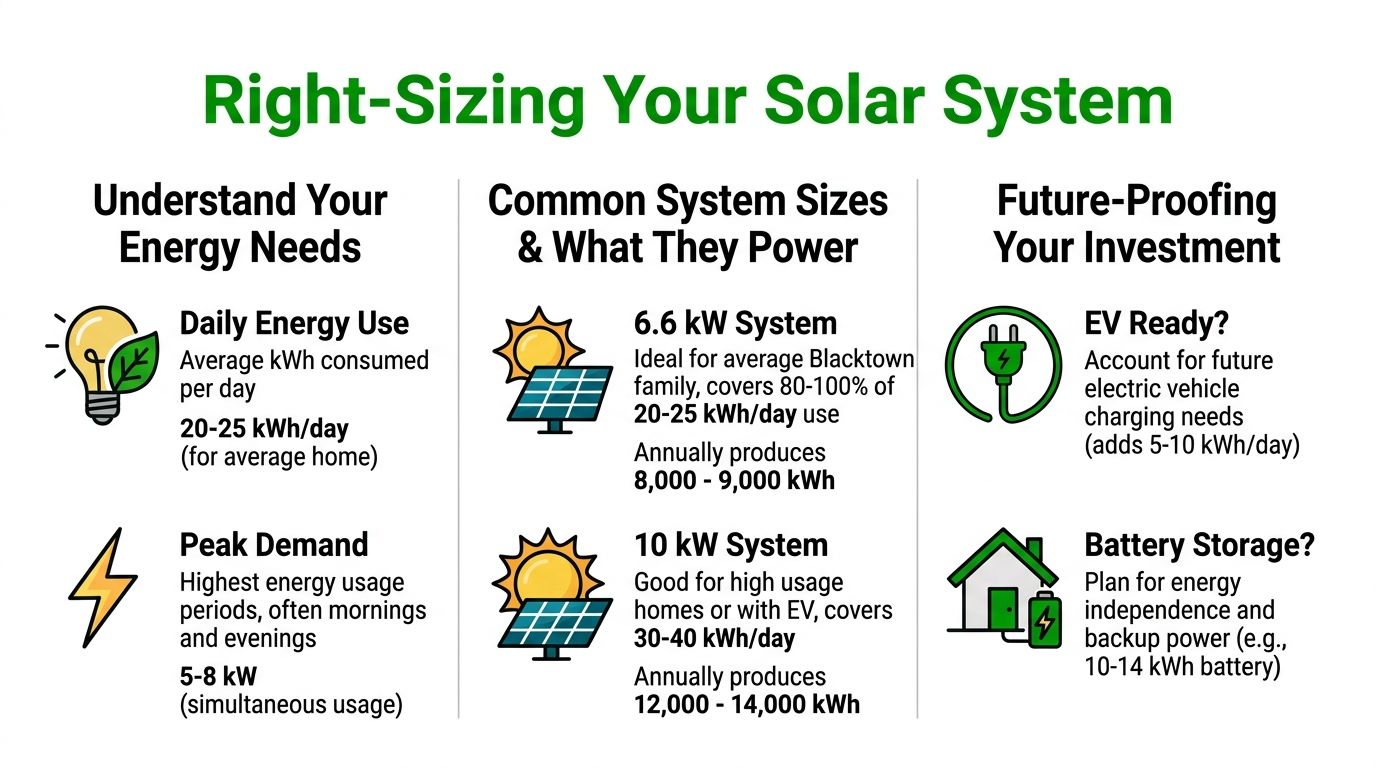
Sizing Your System for Today and Tomorrow
Most undersized systems happen for one reason. The owner buys for the bill they have today, not the energy profile they are building toward.
That matters in Blacktown because solar is already mainstream. Blacktown has rooftop solar on 36.5% of households, above the NSW average of 33.81%, according to the Blacktown City draft low carbon emissions plan. Your neighbours are not adopting solar because it sounds good. They are doing it because it works when the system is sized properly.
Read the bill like a designer, not a customer
The first thing I want to see is not the total amount charged. I want the usage pattern.
Look for:
- Average daily usage: This shows your baseline demand.
- Seasonal differences: Summer air conditioning and winter heating can shift the system size you need.
- Day versus night usage: This affects whether panels alone are enough or whether a battery makes sense.
- Tariff structure: It changes how valuable self-consumed solar is compared with exported solar.
A household that uses most of its electricity during the day can get a very different result from the same size system than a household that empties most of its load into the evening.
Think in loads, not just kilowatts
A better sizing conversation starts with what runs in the house.
Common load questions include:
- Pool pump or no pool pump?
- Ducted air conditioning?
- Electric hot water?
- Home office equipment during the day?
- Teenagers home in the afternoon on screens and air conditioning?
- Plans to shift from gas appliances to electric over time?
A small family home with disciplined daytime usage and no large electric loads may suit a very different setup from a larger household with multiple fridges, cooling demand, and future electrification plans.
Key takeaway: The right system size is not the one that sounds efficient. It is the one that matches how your property uses energy across the day.
Future-proofing changes the design brief
Many quotes fall apart because they are built around current consumption only.
If any of the following are likely in the next few years, plan for them now:
- Electric vehicle charging at home
- Battery storage
- Replacing gas appliances with electric
- Growing family occupancy
- A home office or workshop with regular daytime load
You do not always need to install the battery or charger on day one. But you should design for them on day one.
That may mean:
- choosing an inverter platform with a clear battery pathway
- allowing switchboard space for extra circuits
- positioning equipment where later additions are practical
- sizing the array so future loads do not overwhelm the original design
A second round of retrofit work is rarely as clean as a system planned properly from the start.
Bigger is not always better, but cramped systems are worse
Oversizing without a clear reason can create export-heavy systems that do not match household habits. Undersizing can leave you disappointed and shopping for extra panels or battery work too soon.
The better question is this. What portion of your future electricity use do you want your solar to cover, and how much control do you want over when that energy gets used?
If you want to explore usage scenarios before asking for quotes, a solar savings calculator for NSW homes can help frame the discussion properly.
A practical sizing conversation
When I size a system properly, I look at three layers:
| Layer | What to assess | Why it matters |
|---|---|---|
| Current use | Existing bill and daily habits | Establishes baseline |
| Near-future changes | EV, battery, electrification plans | Prevents underbuilding |
| Property constraints | Roof faces, shade, switchboard, meter setup | Determines what is feasible |
The best solar panel installation blacktown outcomes usually come from clients who think one step ahead. They do not just ask, “How many panels can I fit?” They ask, “What should this property be ready for?”
That is the right question.
Navigating Solar Costs and Incentives in NSW
The cost question is fair. It is usually the first one asked, and it should be. But the useful way to look at solar is not as a household purchase in isolation. It is an energy asset that changes how much power you need to buy from the grid over time.
That means the decision sits on two tracks. How you reduce the upfront burden, and how well the system performs after installation.
Understand the STC scheme properly
A lot of homeowners still call it a rebate. In practice, the federal Small-scale Technology Certificate scheme is better understood as an upfront reduction applied to the system cost through the installer.
That matters because it changes how quotes should be compared. If one quote looks unusually low, check what equipment has been trimmed out, whether the inverter pathway suits future battery storage, and whether switchboard or roof work has been left vague.
A cheap quote can still become an expensive project if core items were ignored at sales stage.
Financing can be smarter than delay
Many households can pay outright. Many prefer not to. Neither approach is automatically better.
Practical options often include:
- Using available savings if the household wants the strongest long-term return
- Green lending or standard finance products where repayments align with expected bill reduction
- Mortgage integration during renovations or broader home upgrades
- Staged installation, where the solar goes in first and battery or EV charging follows later
What matters is not forcing the lowest starting point. It is choosing a structure that keeps the system quality high and the design future-ready.
Tip: If finance helps you install the right system instead of a compromised one, it can be a practical tool rather than a fallback.
A local example that matters
Blacktown City Council’s large rooftop solar project is a useful local example of strategic solar finance. The council installed 1,876 solar panels across 16 community sites, and the project saves an estimated $170,000 per year on electricity bills while cutting 563 tons of CO2 annually, according to Risen Energy’s report on the completed Blacktown PPA installation.
The part worth paying attention to is not just the scale. It is the structure. The project used a Power Price Agreement, which allowed the rollout without the same kind of upfront burden a directly purchased project would have created.
That principle applies at household level too. You do not need to copy a council-scale model. But you should think the same way. Use the available incentive structure, choose a financing path that fits your position, and keep the design focused on long-term bill reduction rather than short-term sticker comfort.
For a plain-English breakdown of current NSW solar rebates and related incentives, it helps to review the programs before comparing proposals.
What good value looks like
Good value is not just lower paperwork cost. It usually includes:
- a design that matches your usage
- equipment that fits your battery and EV plans
- full approval handling
- clear switchboard scope
- realistic installation timing
- after-care when faults or questions come up
Poor value often hides inside “standard packages” that assume every Blacktown home has the same roof, same usage, and same future plans. They do not.
The better solar decision is usually the one that balances access, performance, and expandability. That is how payback becomes practical rather than theoretical.
Choosing Your Installer and The Installation Process
A Blacktown homeowner signs a cheap solar contract on Monday, the crew arrives two weeks later, and the first real surprise is a switchboard that cannot take the new system without extra work. Then the inverter ends up in a hot western corner because no one discussed battery space or EV charging access. The panels still go on the roof, but the job starts compromised.
That is why installer choice matters more than brochure claims. Good equipment installed badly will underperform, create service headaches, and make later upgrades harder than they need to be.

How to vet an installer properly
Start by checking who owns each part of the job. Who designs it. Who installs it. Who signs off the electrical work. Who answers the phone six months later if monitoring drops out or a fault appears.
I would check these points first:
- Licensing and accreditation: Confirm the installer has the correct electrical licence and recognised solar accreditation.
- Design responsibility: The person quoting should understand roof layout, inverter limits, switchboard scope, and future battery or EV charger integration.
- In-house team or subcontractors: In-house crews usually give better continuity between the design, installation, and after-sales support.
- Local operating base: A warehouse, office, or showroom helps with stock control, scheduling, and service follow-up.
- Approval handling: They should manage network approvals and compliance paperwork instead of pushing that risk back onto you.
One example in the local market is Interactive Solar’s installation quality process, which outlines how in-house installation and licensed electrical work are handled. That kind of detail helps when you are comparing providers on process, not just price.
Ask one more question early. Can this installer design the system as part of a bigger energy plan for the property? In Blacktown, that matters. A home adding a battery in two years or an EV charger next summer should not be boxed in by a rushed panel-only layout today.
What the installation journey usually looks like
A well-run NSW installation follows a clear sequence. If the installer cannot explain the order of work in plain language, expect confusion later.
Site survey and technical check
This inspection is thorough. The installer should measure usable roof areas, assess shading, confirm setbacks, inspect the switchboard, and decide where the inverter and isolators should go.
Roof type changes the work. Tile roofs need careful mounting and waterproofing detail. Metal roofs have different fixing points and cable routing decisions. Steep access, two-storey height, and limited side clearance can also change labour time and staging.
System design and scope confirmation
At this stage, good installers distinguish themselves. They lock down panel layout, inverter size, cable runs, monitoring, shutdown requirements, and any switchboard work before the install date is booked.
It is also the right time to confirm future allowance for a battery or EV charger. That may affect inverter selection, wall space, conduit paths, and board capacity. Sorting that out now is cheaper than reworking it later.
Approvals and scheduling
Before the crew turns up, the project usually needs network approval and compliance checks. Installers should give you a realistic timeline here.
Be careful with anyone who treats approvals like a formality that never causes delay. In practice, paperwork, stock timing, roof access issues, and switchboard findings can all affect scheduling.
Installation day
Once approvals and equipment allocation are done, the roof team and electricians complete the physical work. On a standard home, it may look straightforward from the driveway. On site, there is a strict sequence that has to be followed properly.
Typical work includes:
- mounting hardware and rails
- panel placement
- DC cabling
- inverter mounting
- isolators and protection gear
- switchboard integration
- labelling and compliance checks
Neat work matters, but tidy cable clips are not the whole story. Mounting points need to be sound. Penetrations need to be weatherproof. Equipment needs to be installed where it can be serviced, where heat exposure is sensible, and where a future battery or charger does not become an awkward retrofit.
Tip: Confirm the inverter location before installation day. A bad location can limit service access, reduce efficiency in hot conditions, and complicate battery integration later.
The common problems I see most often
The failures that create the most frustration are usually simple planning misses.
Switchboards are a big one. A sales quote may assume the existing board is usable, then the installation crew finds there is no space, no clear labelling, or old gear that should be upgraded before solar goes in. Roof access is another. A layout that works on a satellite image may not work cleanly around vents, hips, valleys, or shaded sections once someone is on the roof.
Communication gaps also cause trouble. If the sales consultant promises one layout and the install crew arrives with different documentation, the homeowner is left sorting out a problem that should have been resolved before the date was confirmed.
The avoidable issues usually come from:
- rushed roof assessment
- vague switchboard scope
- poor handover from sales to install team
- crews arriving without full site context
- no allowance for future battery storage or EV charging
Commissioning and handover
The job is not finished when the panels are bolted down. The final stage should include electrical testing, system checks, monitoring setup, and a clear handover.
Homeowners should be shown:
- how to use the monitoring app
- what normal daily production looks like
- how to shut the system down safely
- who to contact if output drops or faults appear
- what changes if a battery is added later
Later in the process, visual explanations can help. This walkthrough gives a useful general picture of how solar components come together on a home.
What good installers do differently
They manage the whole project, not just the panel delivery.
That means they identify roof and switchboard risks early, explain trade-offs clearly, document what is included, and leave room for the next stage of your energy system. For Blacktown properties, that next stage is often battery storage, EV charging, or both.
A good solar panel installation blacktown project should reduce bills now and make future upgrades easier. If the installer cannot show how the design supports both, keep looking.
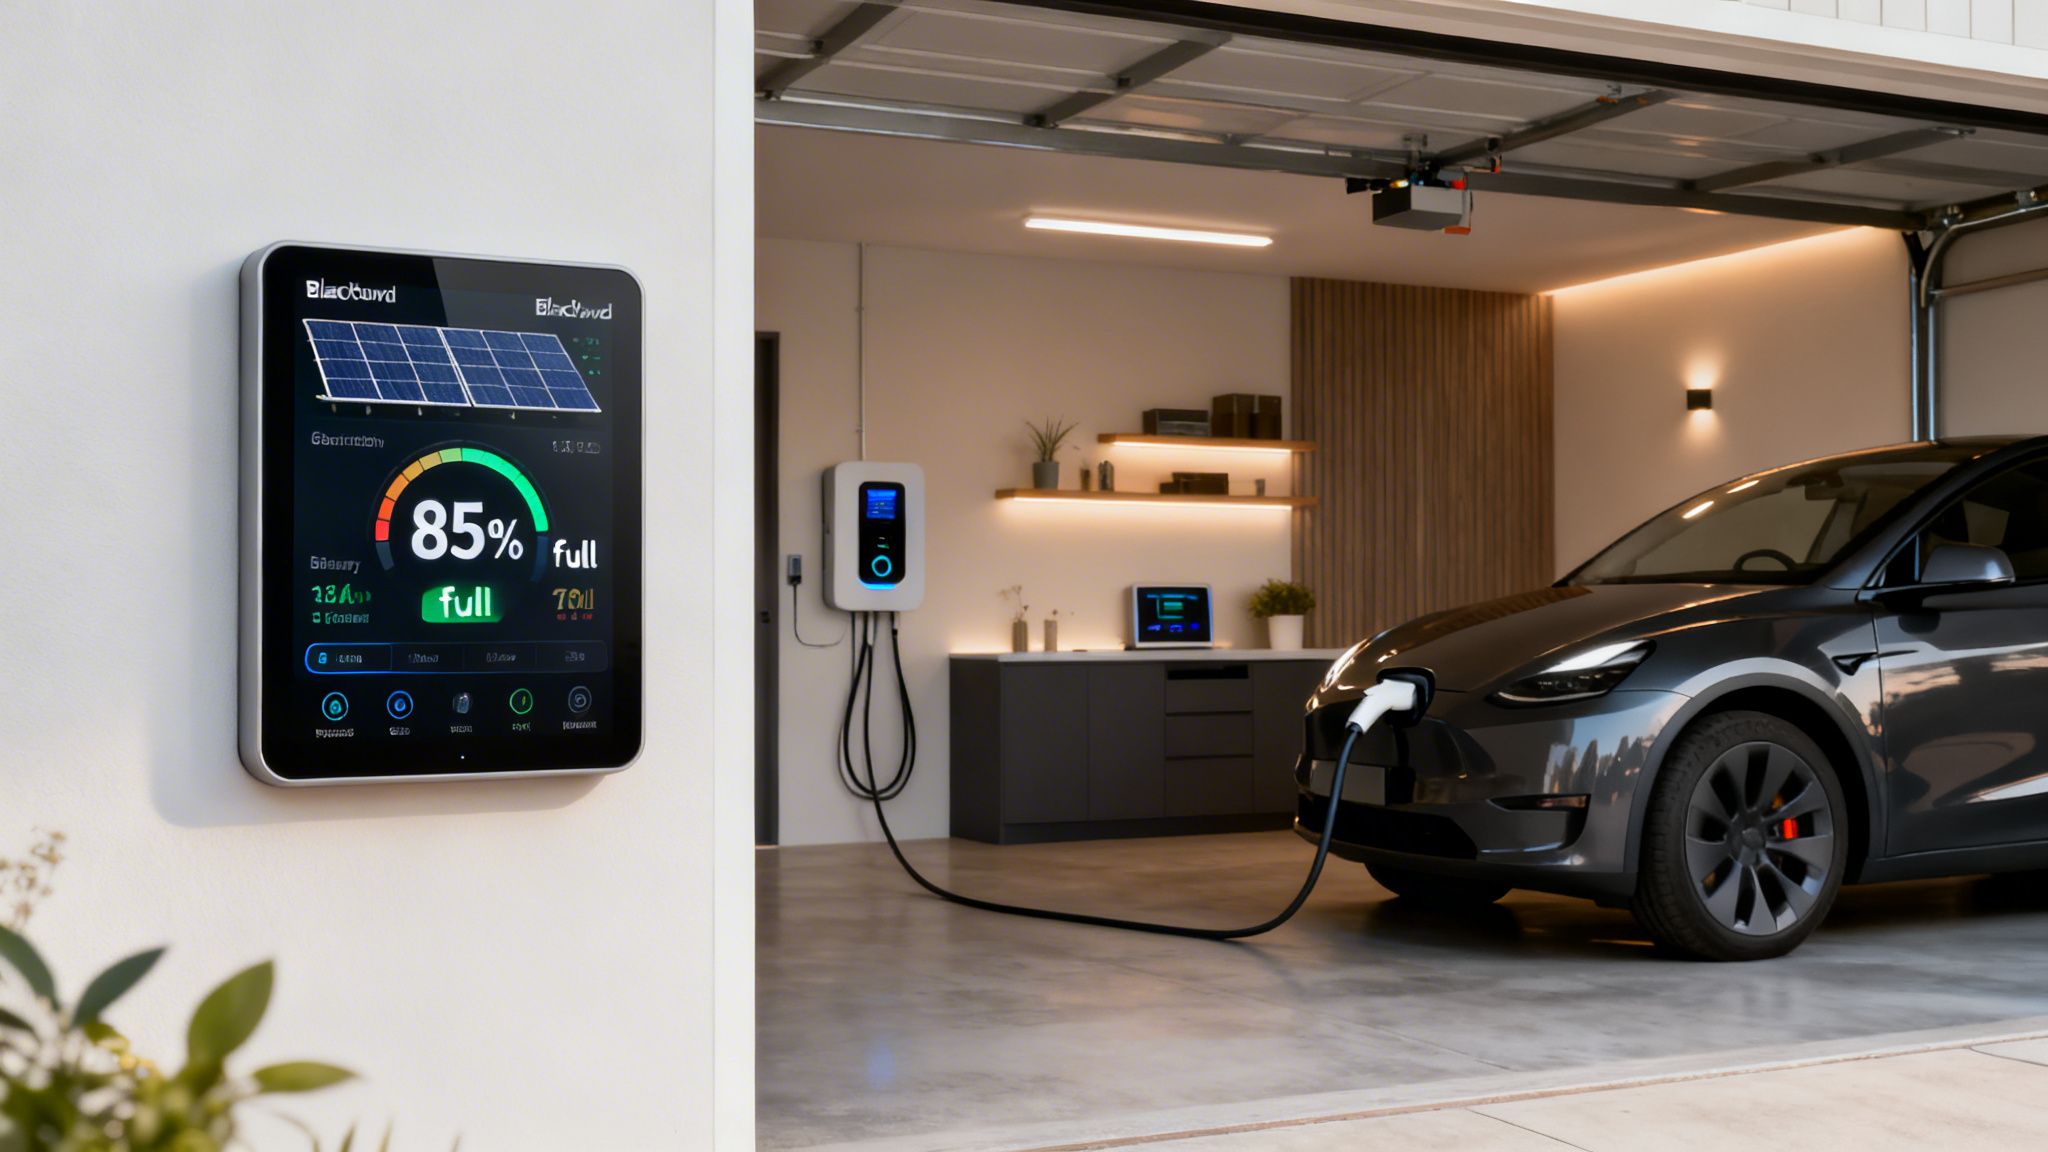
Future-Proofing With Batteries and EV Chargers
A solar system by itself only solves part of the problem. It produces energy during daylight hours. Your house, however, keeps using energy after sunset, and if you move to an electric vehicle, your demand profile changes again.
That is why the better conversation is about the full home energy system, not panels in isolation.
Where a battery fits
A battery stores surplus solar generation so you can use it later instead of exporting all of it during the day and buying power back at night. For many homes, that changes solar from a daytime bill reducer into a broader household energy tool.
The practical benefits are straightforward:
- More self-consumption: More of the power your roof generates gets used in your home.
- Better evening coverage: Stored energy can carry loads after the sun drops.
- A cleaner upgrade path: If the system was designed properly from day one, adding storage later is easier.
Not every household needs a battery immediately. But many households should at least choose equipment and layout that make one practical later.
EV charging changes system planning
An EV is not just another appliance. Once charging becomes part of the house, the solar discussion changes.
If the vehicle charges at home during solar hours, the roof can do a lot of the work. If charging happens mostly overnight, a battery may become much more relevant depending on how the household wants to manage imports from the grid.
That is why I prefer to ask future questions early:
- Are you likely to buy an EV soon?
- Will it be charged at home most of the time?
- Do you want one charger or capacity for two later?
- Is the garage or parking area ready for dedicated charging infrastructure?
Plan the ecosystem, not separate products
The expensive mistake is installing each piece as an isolated job. Panels first with no thought for battery compatibility. Battery later with inverter limitations. EV charger later with crowded switchboard space and poor cable route options.
A cleaner approach is to treat the property as one energy ecosystem:
- Roof generation covers daytime use.
- Battery storage shifts some of that energy into the evening.
- EV charging uses either live solar, stored energy, or controlled off-peak grid supply depending on the setup.
- Monitoring lets you see what is being generated, stored, exported, and consumed.
Key takeaway: The smartest future-proofing often happens before you buy the battery or charger. It happens in the original design choices.
What to decide before installation
You do not need every answer on day one, but these decisions should be discussed before the inverter is selected:
| Decision area | Why it matters later |
|---|---|
| Battery-ready design | Avoids awkward retrofit limitations |
| Switchboard capacity | Leaves room for extra protection and circuits |
| Inverter pathway | Determines how easy storage integration will be |
| Charger location | Affects cabling, convenience, and installation effort |
| Monitoring platform | Helps manage solar, storage, and EV charging together |
If you are comparing storage options, a practical home battery comparison guide helps narrow down what kind of setup suits your property and usage style.
The strongest solar outcomes in Blacktown usually come from owners who think beyond the first installation. Panels are the starting point. The ultimate goal is a home that can generate, store, and use energy on your terms.
Common Solar Questions From Blacktown Residents
Can I install solar on a townhouse or strata property
Sometimes, yes. The issue is usually not technical first. It is approval and roof control.
If the roof is common property, strata approval is usually part of the process. The key is getting clear on ownership, by-laws, available roof space, and where inverter and meter equipment can go without creating access or compliance problems.
What happens on cloudy days
The system still generates power, just less than on clear days. That means you may still use solar during overcast weather, but you will usually rely more on the grid unless you also have stored energy available in a battery.
This is normal. Good system design accounts for real weather patterns rather than assuming perfect sunshine every day.
How much maintenance does a solar system need in Sydney conditions
Most quality systems are low maintenance, but low maintenance does not mean ignore it forever. Panels should stay reasonably clean, monitoring should be checked, and any sudden drop in output should be investigated.
It is also smart to have the system inspected if roof work is done later, if you notice visible damage, or if inverter alerts appear.
How long do warranties last, and what do they cover
Warranty terms vary by manufacturer and by product type. Panels, inverters, batteries, and workmanship are often covered separately.
The important question is not just the number of years. Ask who handles the claim, what labour is included, how faults are diagnosed, and whether the installer remains involved after the sale.
Will solar work if I want a battery later, not now
Yes, if the original system is designed with that in mind. This is one of the most important planning decisions to get right early.
A battery-ready pathway usually depends on inverter choice, switchboard space, equipment location, and how the original system was configured. Retrofitting is much easier when the installer planned for it from the start.
If you want a solar panel installation blacktown plan built around your roof, your switchboard, and your likely future battery or EV charger needs, speak with Interactive Solar. A proper site assessment and a realistic design brief will tell you far more than a generic package quote ever will.